Create Live Chat Widget #
First things first! Creating a live chat widget is easy and straightforward. Here’s how you can quickly set up and customize your widget to perfectly match your website’s style:
- Navigate to Sites > Chat Widget
- Click New where you can choose one of the following: All-in-one chat, SMS / Email chat, Live chat, WhatsApp.
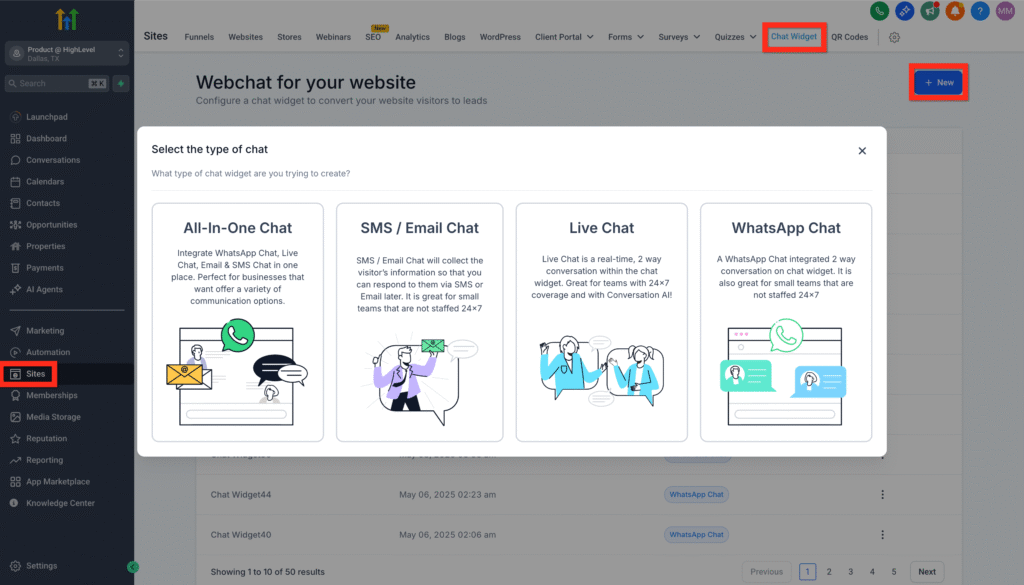
- Select Live Chat
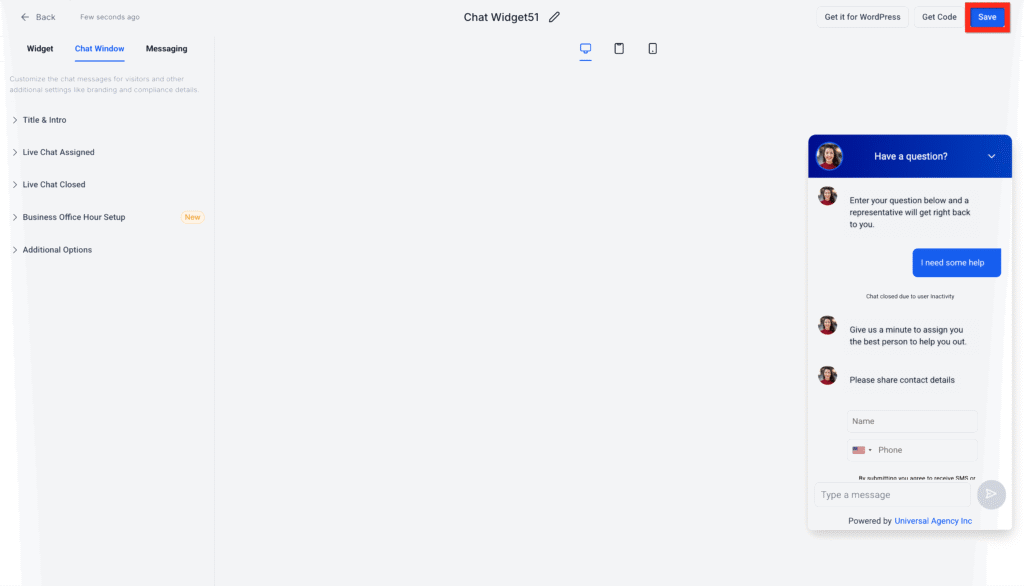
- Customize your widget to fit your brand
- Click Save
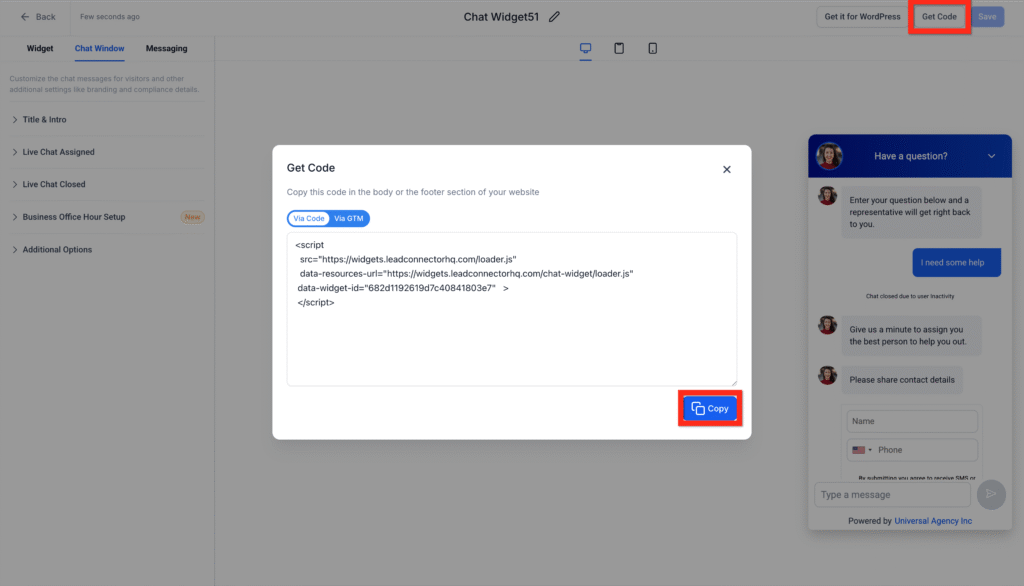
- Click Get Code > Copy
- Copy the provided embed code
Learn More
- How to Use the All-in-One Chat Widget
- How to Add Multiple Chat Widgets to the Same Website
- Getting Started with Chat Widget
- Overview of Chat Widget Customizations
Next, you can decide how you’d like to deploy your new widget! Let’s explore your options.
Deploy Live Chat Widget via Embed Code #
Already familiar with adding scripts directly into your website or funnel? Perfect! Embedding the chat widget directly into your site editor couldn’t be simpler. Follow these quick steps:
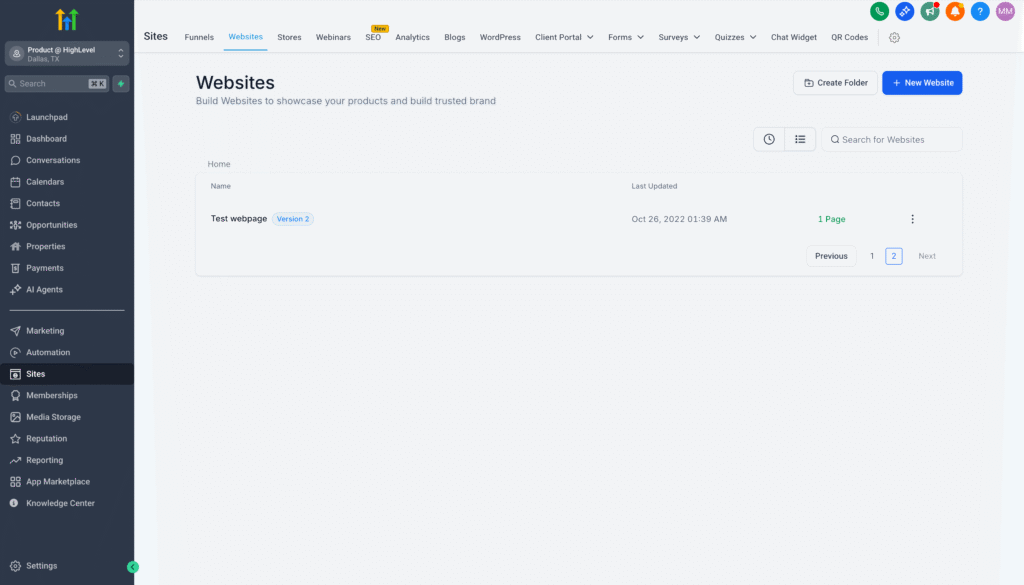
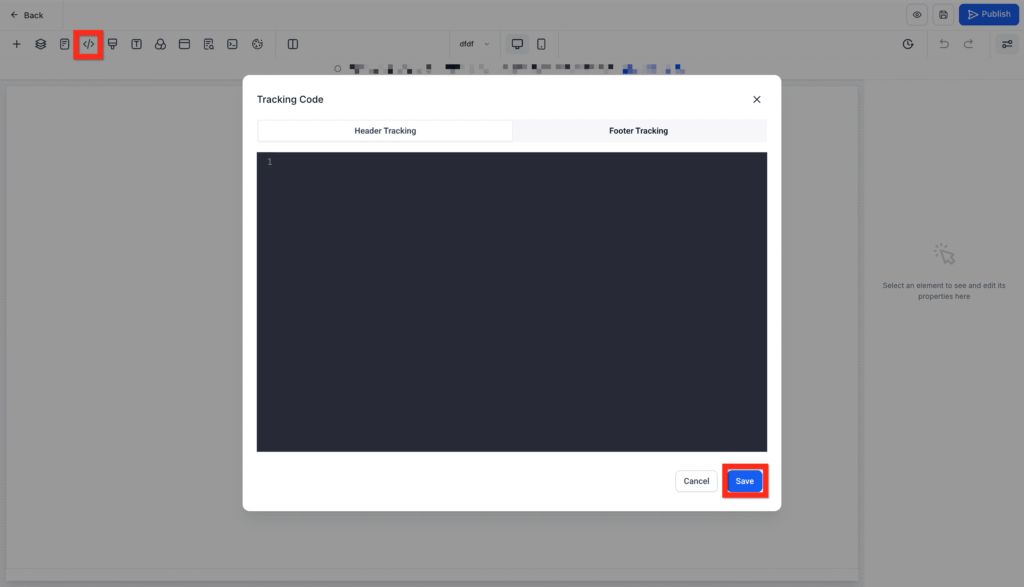
- Navigate to Sites > Websites OR Sites > Funnels
- Find your desired website or funnel and open it for editing
- In the editor, click the Tracking Code icon (
</>) - Paste the copied chat widget code
- Click Save
Learn More
Great job! Next, you might consider testing your widget to ensure it’s functioning seamlessly.
Deploy Live Chat Widget via Settings #
Prefer to keep things even simpler? Deploying your widget directly through your website settings is super convenient, especially if you’re less comfortable dealing directly with code. Let’s walk through it:
- Navigate to Sites > Websites OR Sites > Funnels
- Find your desired website or funnel and open its settings

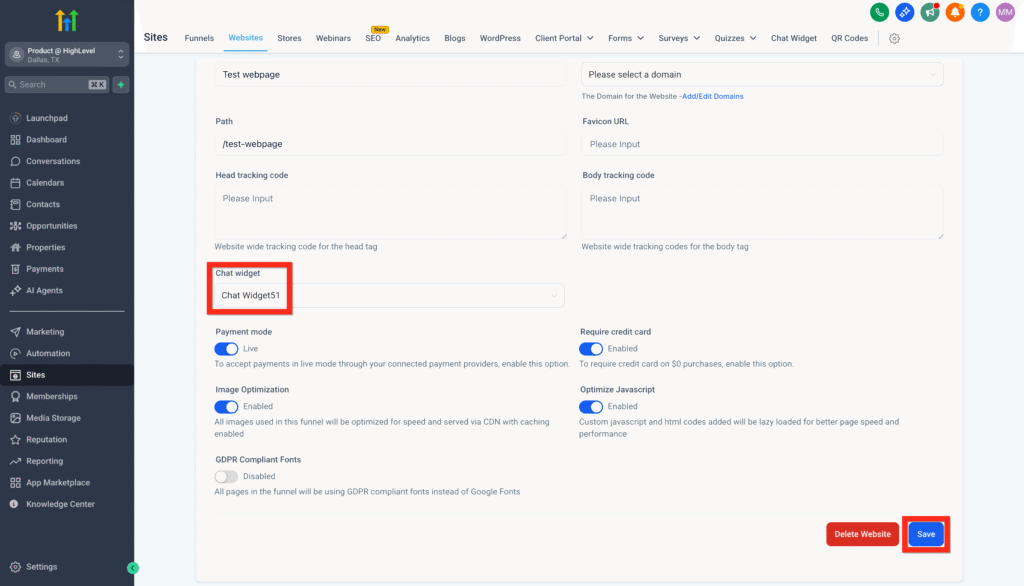
- Under the Chat Widget section, select your live chat widget
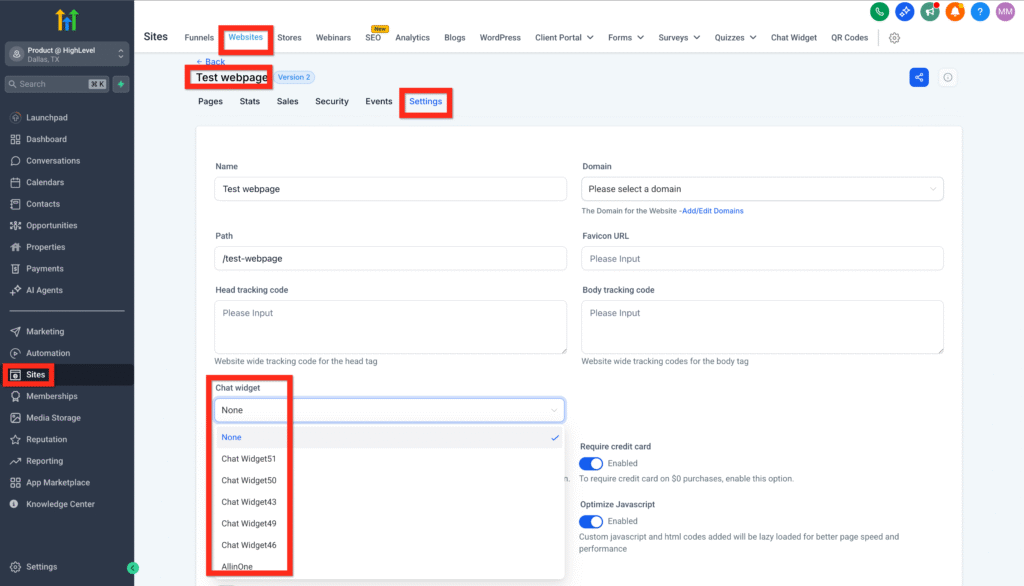
- Click Save
Fantastic! You’re all set. Next, why not explore advanced customization options to really make the chat experience unique to your brand?