Create Invoice #
Ready to send your first invoice? Great! Here’s the simplest way to create one:
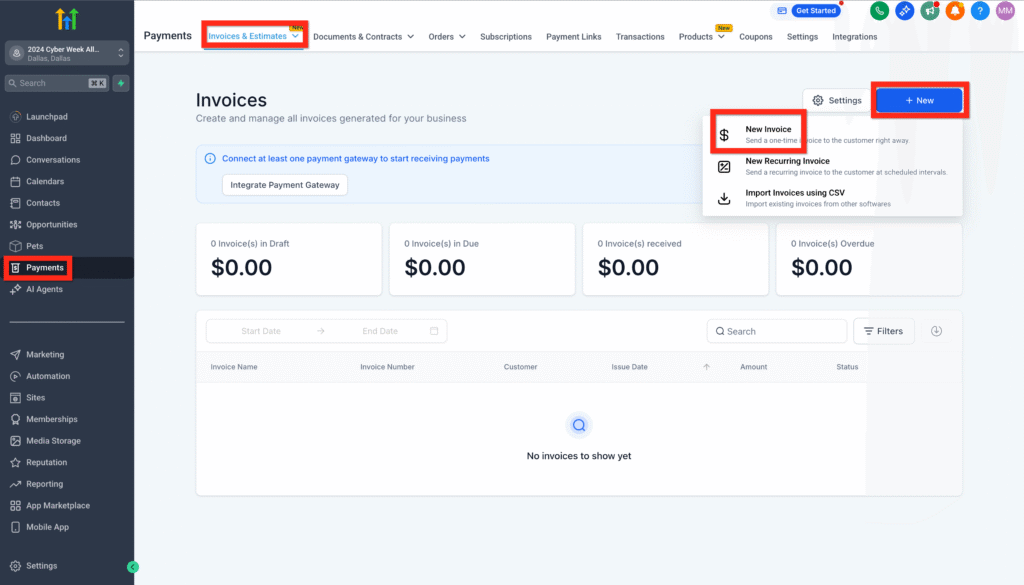
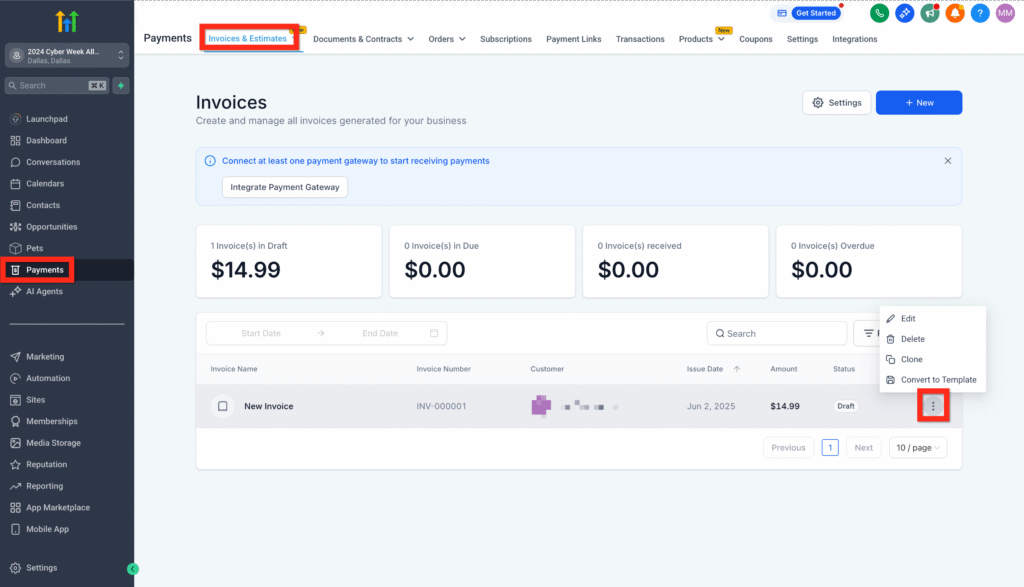
1. Navigate to Payments > Invoices & Estimates.
2. Click New > New Invoice.
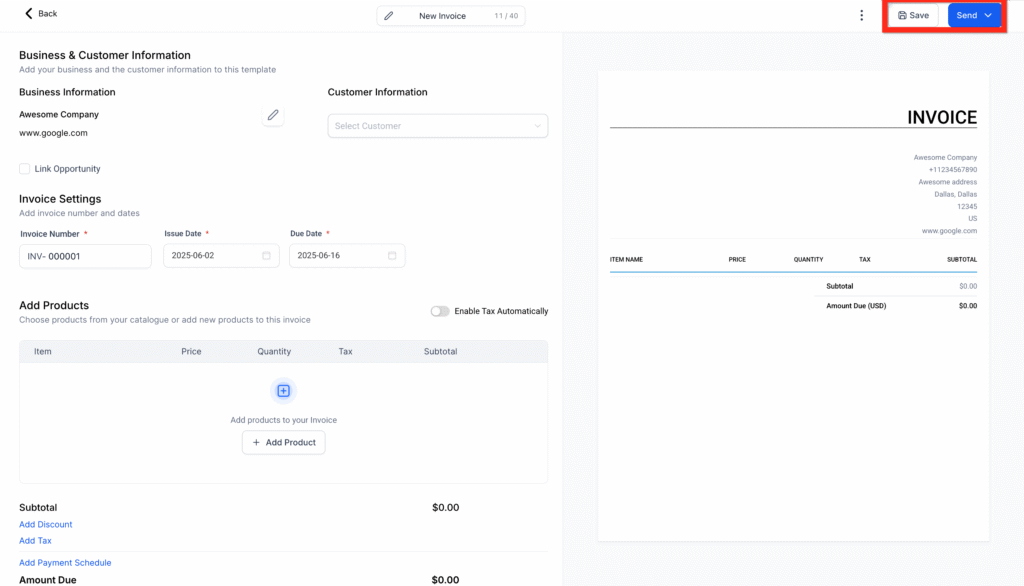
3. Configure your invoice with details (items, prices, customer info).
4. Click Save.
5. Finally, click Send.
Next, you can:
- Explore adding payment plans to help your customers.
- Set up recurring invoices for ongoing services.
Learn More
- How to create invoices in SalesKaki
- How to add Payment Plans to your Invoices?
- How to create recurring Invoices
- How to create invoices in SalesKaki (Mobile App)
Edit General Invoice Settings #
Customizing your invoices makes your brand stand out and ensures clarity. Here’s how to make your invoices uniquely yours:
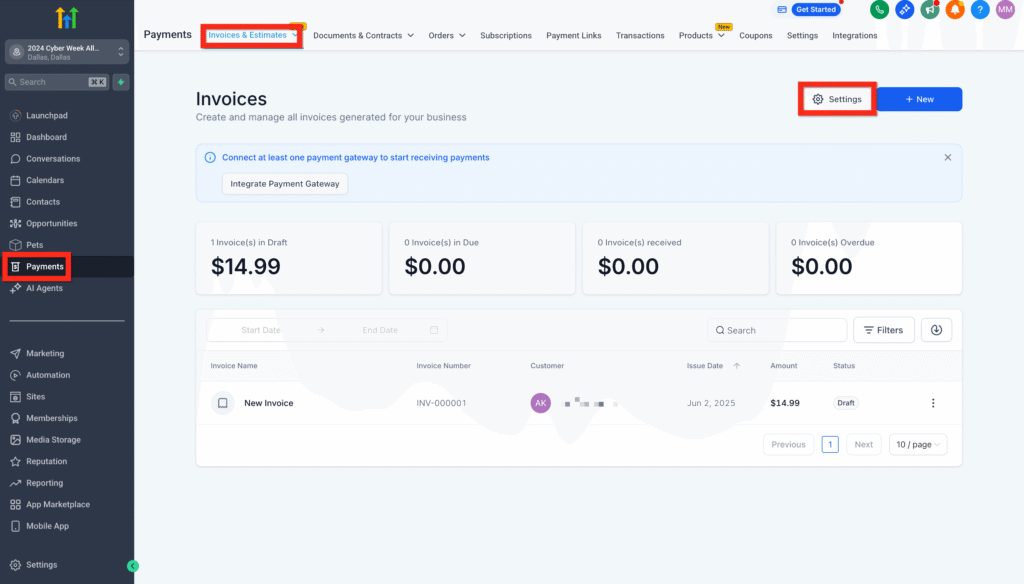
1. Navigate to Payments > Invoices & Estimates.
2. Click the Settings (gear icon).
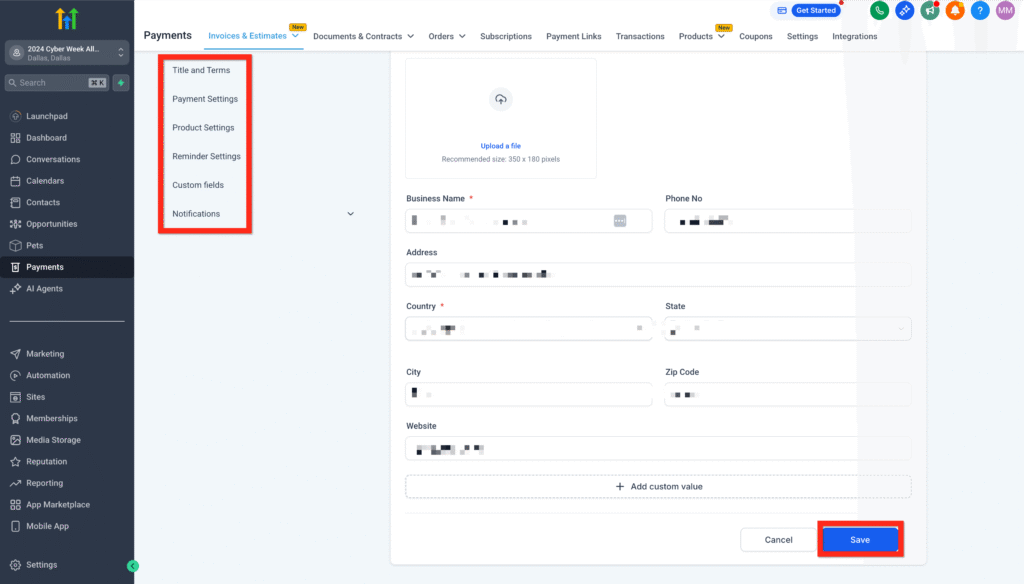
3. Adjust your general settings (add your logo, company info, default payment terms).
4. When you’re satisfied, click Save.
Next, you can:
- Set up recurring invoices to streamline regular billing.
- Adjust your payment schedules to manage partial payments smoothly.
Learn More
Manage Invoice #
Keeping track of your invoices helps you stay organized and ensures timely payments. Here’s how to quickly manage your existing invoices:
1. Navigate to Payments > Invoices & Estimates.
2. Find the invoice you’re looking for in the invoice list.
3. Review its status (e.g., Draft, Sent, Paid).
Next, you can:
- Follow up with customers directly from the invoice view.
- Create new estimates or invoices based on previous ones.
Happy invoicing!